Showing posts with label finish. Show all posts

Sunday, September 16, 2012

Interior Color

Modern architectural style allows for two colors: black and white. That, at least, is the stereotype. But color is an important element in setting the mood of an interior, and paint is one of the cheapest ways to make a dramatic statement. We wanted to use color as a decorative element in our home.

Choosing the colors
The first step was choosing a color palette. We started with some options that our color designer put together for us. We chose a fairly complex palette: 5 colors, including Martha Stewart's Terra Rosa.


We experimented with many different combinations of colors from the choices Anne had put together for us. While there were some combinations that didn't work together, overall, we would have had a difficult time choosing a palette we disliked from the choices we had.

Eventually, we decided that bordeaux and slate teal (the main middle and right colors above), were our two must have colors. The lighter purple (dreamy) and lighter blue (saratoga springs) each on their own left the palette feeling a little unbalanced, so we decided to use both as approximately harmonious lighter shades of the purplish bordeaux and blueish slate teal. When we were onsite deciding where to use the colors, we decided to throw in terra rosa. We wanted something a little brighter and more energetic for the laundry room.

Using the colors
Once we chose a color palette, we got to decide where to use it.

Window frames
We chose to go with dark window frames on the interior. The dark trim, which matches the frame color on the exterior, both accents and minimizes the window frames. The dark trim really pops against the white walls, but it is actually less noticeable than white trim when looking through the windows at the view.

Dining room accent wall
We wanted the dining room wall to be a splash of rich color to help define the dining room as a separate region within our open space and to act as a frame for a couple pieces of frameless art that we plan to put on that wall. Our color designer, Anne, likes to always end color on an inside corner so that it doesn't feel like it suddenly died. From that, we got the idea of treating that wall as if it were a teal block penetrating the room. We even continued the color inside the entry closet to really emphasize that effect.


Powder room
We had conceived of the powder room as having a dark grey accent wall to contrast with the slightly golden tan tiles, but when it came down to choosing the wall, we couldn't decide which one to paint. Instead, we decided to take a risk and paint the whole powder room dark, ceilings and all. The effect is dramatic, but we think it works.

Bedrooms
We chose not to use any paint in our bedroom, but we wanted to have a little fun in the secondary bedrooms. These two bedrooms are are nearly identical, so we wanted to use color to differentiate them. From Eve Ashcraft's The Right Color we got the idea of painting the ceiling and closet interior as a way to add color without making the color as overwhelming as it would be if all the walls were painted. We made the east facing bedroom the morning room and accented it in blues. The evening room is accented in purples.


Laundry room
Laundry rooms can be boring, so we wanted to use color to give the room some energy. We decided to do this using two accent walls in a bright coral color. Because colors tend to look brighter and lighter when painted on a wall, we went with terra rosa, which appears a bit subdued in small quantities. As the picture below shows, it's anything but subdued when you paint two walls with it.

Media room
We wanted the media room to be fairly dark so as to minimize reflection from stray light when we are watching movies. Given our palette and tradition, the obvious choice would have been bordeaux. Dark rich reds go with theaters like bright reds go with sports cars. However, one of our inspiration photos had been a dark blue room, so we decided to use the slate teal for the walls and ceiling of the media room. We paired this with dark trim to create a room that will enclose and embrace its occupants.

By using color selectively, we've been able to add some interest without taking away from the clean, refined look we are trying to achieve for the house.

Monday, September 10, 2012

Doors and Trim

Doors and trim may not be the sexiest part of a house, but without them a house won't look finished.

Tall trim is popular now, but we didn't feel it was the right look for our house. We wanted something minimal. Our trim is about one inch tall and not quite as deep. We debated between a wood finish to match the floor or white painted trim to match the walls. We chose the painted version, partly because it was a bit cheaper.

The electric outlets on the main floor are low and oriented horizontally to continue the clean look. With white paint on all of the doors, trim, and windowsills, the trim pieces almost disappear. The door handles are simple but elegant in a silver metal.
White trim
There were some exceptions, of course. Our dramatically dark media and powder rooms called for dark trim and doors. The trim in rooms with tiled floor is also tile. The exterior doors have dark bronzed hardware instead of the silver used inside.

Dark door in media room

Most of the doors are normal hinged doors, but there are some exceptions. The media room door has weatherstripping to help isolate sound. The toilet closet in the master bath has a pocket door (sliding door in the wall) to keep it compact. We eliminated the pantry door completely to make access easier.

Other than the entry door, which got a post of its own, we had three doors that we wanted to make more interesting. We wanted to add interest to the main floor and upstairs landing, and we wanted doors that would stay out of the way when they are open (which we expect them to be most of the time). For these locations we chose barn doors — sliding doors mounted on the wall so that they slide in front of it.

Translucent doors allow light through and complement a modern aesthetic. One appealing option was 3form, their Varia Ecoresin comes in a variety of colors, textures, and patterns from inserted materials. We also considered doors from The Sliding Door Co., which has a variety of simpler designs.

Ultimately our favorite option was frameless frosted glass doors with prominent hardware from the Sliding Door Co. The hardware is a bit industrial-looking but also sleek and modern. Upstairs, we matched the doors to the kids suite and the master suite even though the openings are different widths. The identical doors in different positions (one nearer the stairs and one farther) provide a nice balance.
Office barn doorSliding door hardware, with rubber stops

The sliding doors provide impact in a few key places, while the rest of the doors and trim serve to finish the edges in the house without drawing too much attention. Perhaps more exciting, once you get to trim and doors, you know you're approaching the finish line!

Sunday, July 22, 2012

Flooring

Floors are an unavoidable fact of life in this gravity conquered world. It seems to be little more than an expanse of necessary eye candy. But flooring can have as much impact on the feel of a home as any other element.

And, of course, A Pattern Language has a pattern to capture the approach we should take with flooring.

Floor Surface (233):
  • Problem: We want the floor to be comfortable, warm to the touch, inviting. But we also want it to be hard enough to resist wear, and easy to clean.
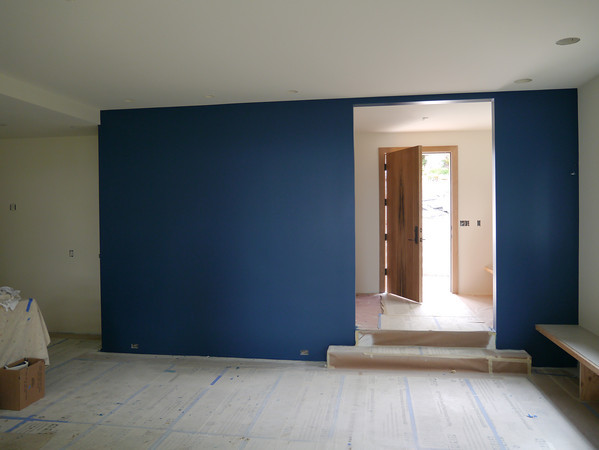
  • Therefore: Zone the house, or building, into two kinds of zones: public zones, and private or more intimate zones. Use hard materials like waxed, red polished concrete, tiles, or hardwood in the public zones. In the more intimate zone, use an underfloor of soft materials, like felt, cheap nylon carpet, or straw matting, and cover it with cloths, and pillows, and carpets, and tapestries. Make a clearly marked edge between the two — perhaps even a step — so that people can take their shoes off when they pass from the public to the intimate.

This ties in closely to...

Intimacy Gradient (127):
  • Problem: Unless the spaces in a building are arranged in a sequence, which corresponds to their degrees of privateness, the visits made by strangers, friends, guests, clients, family, will always be a little awkward.
  • Therefore: Lay out the spaces of a building so that they create a sequence which begins with the entrance and the most public parts of the building, then leads into the slightly more private areas, and finally to the most private domains.

In our house, the entrance and main level are public spaces. The lower level is semi-public, the upstairs landing and laundry room are semi-private, and the bedrooms are the most private spaces. Combining that with the flooring guidelines led us to

  • Hardwood for the main level and all the stair landings: these public and semi-private spaces need durable flooring
  • Tile for the entrance and the wet areas (laundry room, full bathrooms): these areas take the hardest and dirtiest wear
  • Carpet for the bedrooms: the softness of the materials provides comfort and emphasizes their private nature
The media room is a bit of an exception. Its status as a semi-public space might suggest hardwood. However, since sound reflection is something that needs to be controlled, we will use carpet. The office and powder room on the main floor are not technically public spaces, either, but hardwood is a reasonable choice for them because of their adjacency to the public areas and the way they are used.


Flooring in depth


Hardwood

Hardwood dominates our floors. Its pervasive presence makes a major contribution to the character of our home. Because of this, we spent a lot of time making our choice. The obvious consideration is the type and color of the wood, but there are other aspects to consider.

Structure
The first consideration is wood structure. Solid hardwood is what it sounds like: each board is a single solid piece. Engineered hardwood is made of several layers: a top layer of the desired wood above a few layers of a manufactured wood product such as particle board or plywood.

Solid wood flooring can be completely sanded and refinished 5-7 times, since the wood is the same all the way down. Engineered flooring has a thinner layer of the surface wood; the better products can handle 3-5 sandings. Engineered flooring is much more stable. Wood expands and contracts based on temperature and humidity. The several layers in an engineered plank mitigate this by expanding/contracting at different rates. This allows for the use of wider, tightly seamed planks.

This choice was easy: we decided to go with engineered wood. Our builder recommended it, and the stability and precision of the boards was appealing. The wear layer is 1/4", which is on the thicker end for engineered flooring, and the refinishable layer of solid wood (before the tounge & groove and nails become visible) isn't necessarily much thicker.

Finish
The second consideration is finish. We considered polyurethane coat and oil finish. A poly coat is basically a liquid plastic that coats the floor. It completely covers and protects the wood, and leaves a smooth, glossy finish. It needs little maintenance, can be mopped, and gives a much glossier look. The disadvantage is that the poly coat will collect noticeable scratches over time, and cannot easily be spot-repaired: a large section (up to the entire room) has to be refinished to keep the coat consistent. In contrast, an oil finish gives a more natural look to the wood and allows spot-repairs. The disadvantage is that it requires an annual application of oil and requires more care when cleaning it. A big difference from polyurethane is that an oil finish does not create a barrier, and so the wood will acquire more wear (including stains) over time.

This was a tougher decision. We weren't attracted to the poly coat finishes. It doesn't fit the natural look we want on the main level, and the propensity to show scratches was not appealing. While a yearly re-oil of the all the wood floor is far from ideal, we were attracted to the natural aging gained by an oil finished floor. We like materials that age gracefully, and having a floor that will accept changes fits that desire.

Yuval recommended Navarre Oiled Floors. They are wide-plank, thick-veneered, engineered, oil-finished hardwoods. We wanted something fairly subtle so that it wouldn't overwhelm the room. We eliminated the options that were too red, too yellow, too dark, or too busy (mainly in the exotic woods). We ended up going with Montauban, a nice white oak.

Wood for all of the main level (a bit dusty)

Hardwood is installed fairly early in the finishing process so that cabinets, trim, etc. can be installed on top. But it is more easily damaged than tile, so it needs to protected during the rest of construction. They ended up using the boxes that the flooring came in to protect the floor. They are taped down (with painter's tape) so they don't slide around, and the edges are left clear for trim installation. I thought it was a clever solution.

Protection for the whole main floor, with space for the cabinets

Tile

Keeping to the theme of natural-looking materials, we decided to use a stone-look tile throughout. In the bathrooms a bit of texture will help to prevent the floor from getting too slippery when wet. Many of the tiles we looked at can be used outside, which would allow us to unify the interior and exterior portions of the entry with the same flooring. Yuval recommended Ecotech tiles, which we really liked. We settled on the Ecogreen in the structured (rougher) finish for all the tiled floors in the house.

Entry & step with tiles
Tile in master bath

Carpet

Carpet is installed at the end of construction to prevent unnecessary wear or damage. We have just started looking at products and colors. We will probably choose a light- to medium-grey color for the carpets in the bedrooms. It should be fairly neutral, and work well with dark woods (in the master suite), and whatever paint colors we use in the second bedrooms. The media room will take a darker color, possibly something similar to the Bordeaux color from our color palette.

The media room will use a fairly dense carpet that will wear better, but isn't quite as cushy. The bedrooms should have less traffic, so we will use something a bit plusher and more comfortable on the feet. Yuval suggested a couple simple nylon green carpets: Americana (denser) and Mica (plusher), both from Masland. We are also looking at Karastan SmartStrand carpets, which are an interesting green carpet made from corn. As novice fiber nerds, we were required to look briefly at wool carpets. These are generally considered green, but are more expensive, not as plush, and are generally looped carpets (less good with clawed critters).

Conclusion

Despite having only three types of flooring, a lot of effort has gone into choosing exactly the right material and style for each portion of the house. It needs to fit the intimacy gradient, be appropriate for the amount and type of wear, and give the appropriate character to each room.

With the majority of the flooring installed, we are pleased with our choices. Having flooring goes a long way toward making our building feel like a real house and really starts to give a sense for how nice of a space it will be.

Saturday, July 7, 2012

Choosing a color palette

We're still a bit away from done with the house — about a month further away than we thought (more on that later). However, we're close enough to done that it's time to start thinking about a color palette.

Based on our preferences and some art we own, our color designer chose some candidate colors for us. Now we need to narrow it down to three or four colors to use for our palette. We have some ideas, but it seemed fun to gather some other opinions. Here are the colors. Let us know in the comments what combinations of three or four colors are your favorites.

Details: the walls are going to mostly be white. The color palette will be used for a few accent walls and for accents in furnishings and accessories.


slate teal
azores
marble canyon
saratoga springs
bordeaux
dreamy

Sunday, May 20, 2012

Insulation and Drywall

Insulation

Insulation completes the rough-in stage of the house. It and drywall mark the transition between focusing on the structure of the home to focusing on the details.

Spray foam in entry way
Spray foam in the ceiling
To ensure a tightly sealed home, we had foam sprayed into the places where ceiling joists could expose a gap to the exterior, e.g., the ends of ceiling joists that extrude outside and the center beam of the roof. Foam was also sprayed onto some of the foundation walls that protrude into the interior.

Exterior wall of main floor insulated
Insulation batts
Next the insulation batts went in. All of the batts are formaldehyde-free fiberglass. We insulated all of the interior walls with R-11 and R-13 for sound deadening (more on our soundproofing). This is enough insulation to stop some sound, but not enough for heat insulation. The external walls use R-21 insulation for better thermal control. Insulation was installed throughout the house, including under the floor in the crawlspace and the garage.

Drywall

Drywall starts the interior finishing stage. It covers up the bones of the house, and provides a blank canvas for the interior.

The drywall process is complex. The goal is to achieve flat, seamless surfaces for the walls and ceiling. The quality level of the drywall, from 0-5, specifies how flat and level it is. Level 3 is about the minimum you'd want inside a house, and level 4 is probably more normal for quality construction. Our house is getting level 5 drywall throughout, which allows us to avoid any texture on the wall. Instead, we have a smooth surface that will just be covered with paint. This increases light reflection, especially in windows up against the ceiling where the light may be coming in nearly parallel to the drywall surface. Wikipedia has more details about all the levels.

Getting this level of smoothness takes many steps:
  1. Various markings on floor to indicate holes that need to be cut in the drywall to expose light fixtures, outlets, vents, etc.
    Floor markings indicating what's in the walls and ceilings
    Level the studs: The studs need to be level enough to avoid creating bows or bends in the drywall. In our case, at least one stud had to be removed and replaced because it was warped.
  2. Fireplace boxed in, with bench still rough
    Drywall, just hung.
    Notice the roughness of the corners and seams.
    Hang the sheetrock: Boards are cut and screwed in to the studs such that all of the walls and ceilings are covered by the sheetrock. Holes for lights, outlets, vents, and any other openings in the wall are cut at this stage. Since it is easy to lose items behind drywall, the installers marked everything out on the floor before any sheetrock went up.
    The sheetrock at this stage is pretty rough. Edges, especially corners, can be uneven. Screws are sunk a bit into the drywall, making small depressions. There are gaps between sheets and around cut-outs. It looks like a bunch of panels stuck on the walls. This makes the rooms feel a lot smaller than before.
  3. Kitchen with mud & tape
    Tape and mud
    Seal the gaps: The next step is to seal up all the gaps and start evening the surface. This is done using mud, tape, and corner strips. Mud is put in-between the gaps in the sheetrock, and tape is embedded to provide some structural support. Particularly for inset corners, the tape helps to make a sharp right-angle. Mud is spread lightly over the screw holes to bring them up to level with the sheetrock. Corner strips are used for outset corners. These are a thin piece of metal at a right angle, with some tape over that. Putting these over outset corners and applying mud covers up the rough edges of the drywall, and provides a sharp, clean corner. At this point, the walls start to look more coherent, and the space opens up a bit.
  4. Slight soffit in upper landing
    Corners and more mud
    More mud: Two more layers of mud are applied as-needed to level everything out, especially the corner strips and tape, which may have slight raised edges otherwise. The edges of openings, such as can lights, are covered and leveled with mud. Each layer of mud needs to dry, so the house is warmed up and let sit for a day or two.
  5. Detail of Smooth-Wall finish. The boxes got a bit of spray.
    The smoothing layers
    Smoothing coats: The final step is to add two full coats of material to smooth and level the dry wall. This was done using Smooth-Wall, a spray-on self-leveling coating that brings the drywall up to level 5. It serves as a polyvinyl acetate (PVA), which provides a basic primer coat, and makes everything a uniform material. These coats are just a primer and leveler, so the walls aren't meant to look perfect. There is a slight variation in color due to the drywall, and a slight texture on the walls. Both of these will be cleaned up with a couple layers of paint.

At this point, the walls and ceilings become a single smooth, level piece. The rooms are well-defined, and the surface looks very close to its final state. The perspective of the rooms change a bit; the ceiling height on the main level is more apparent, as is the shape of the soffits, columns, and doorways. The walls are now ready for paint.